
We've sourced room blocks from some properties, so we're now able to allow our guests to book reservations, and we'll be able to manage our block. If you have not yet completed Step 1 - Sourcing, you'll need to do so before you can finish the rest of this tutorial.
Book Reservations
Let's make a couple of reservations so that we know what our guest will experience when making a reservation through our booking engine website. At the top of every event level page in GPS, you will find an event details panel. In this panel, there will be a link to your event booking engine.

Once you are on the booking engine, you will be prompted to check rates. The Check-in and Checkout dates are based on your event's arrival date and the number of nights event participants will require a sleeping room.
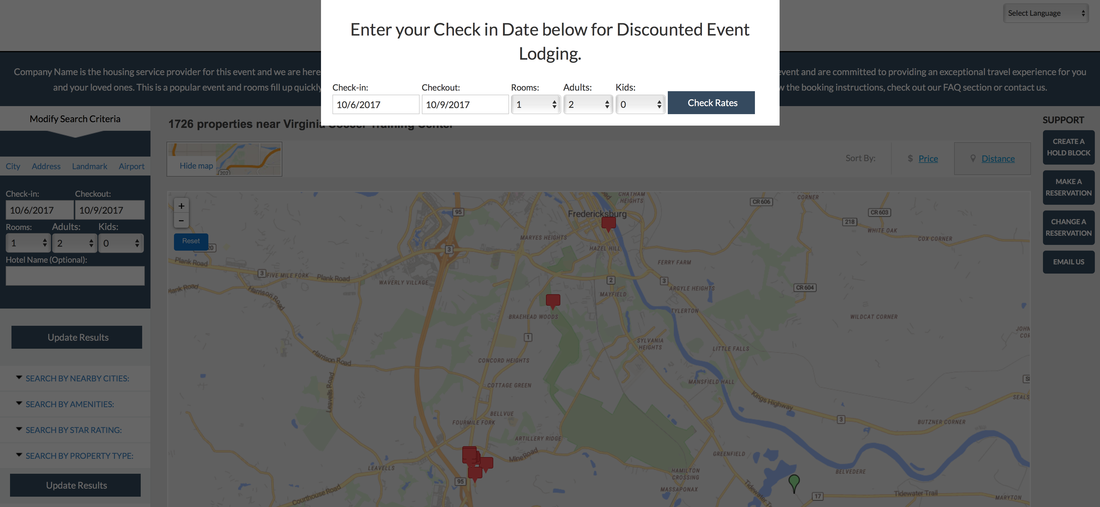
As this is a sporting event, most of our guests will want to block off some rooms for their team members. We call these on-hold blocks. To create an on-hold block merely click View Rates for the hotel of your choice.

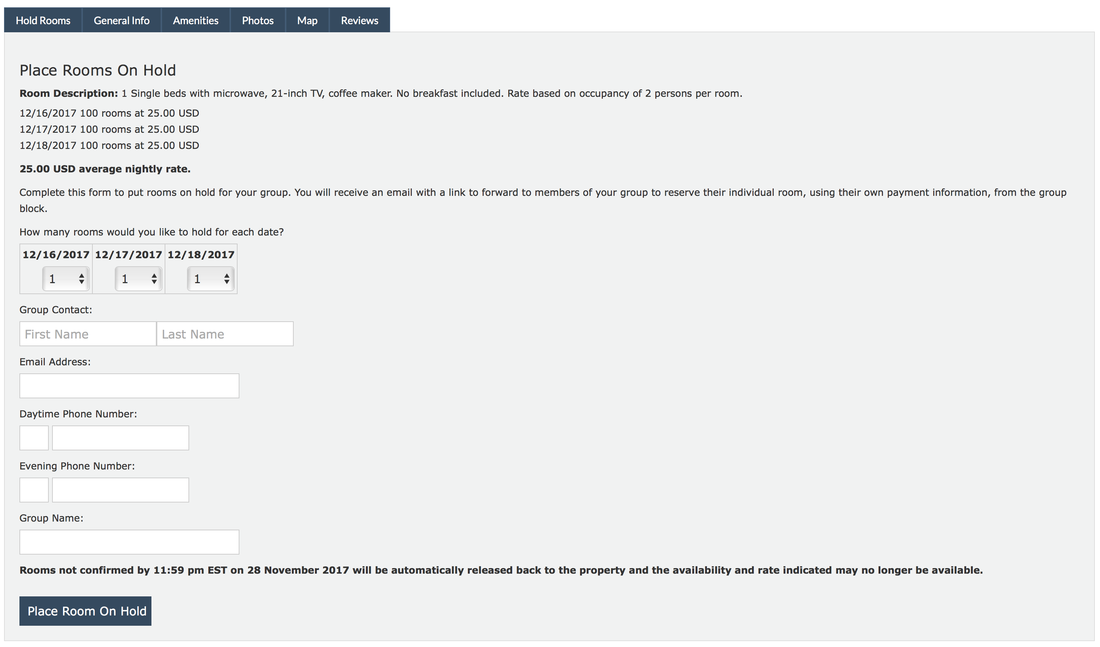
From the property details page, determine which room type you would like to block rooms for and click the Hold Rate button. Alternatively, guest can book individual reservations by using the Book Rate button.

Complete the block hold form and click the Place Room On Hold button.
Check your email's inbox. The email will contain a unique reservation link, and this is the link that we will want to send out to all of the team members that we want to stay in our on-hold block. Use this link and make a couple of reservations, so we can see what they look like in the GPS application.
On-Hold Blocks
In the GPS application, there are multiple ways to find On-Hold blocks.
1. In the left navigation bar, go to Search > On-Hold search.
On-Hold Blocks
In the GPS application, there are multiple ways to find On-Hold blocks.
1. In the left navigation bar, go to Search > On-Hold search.

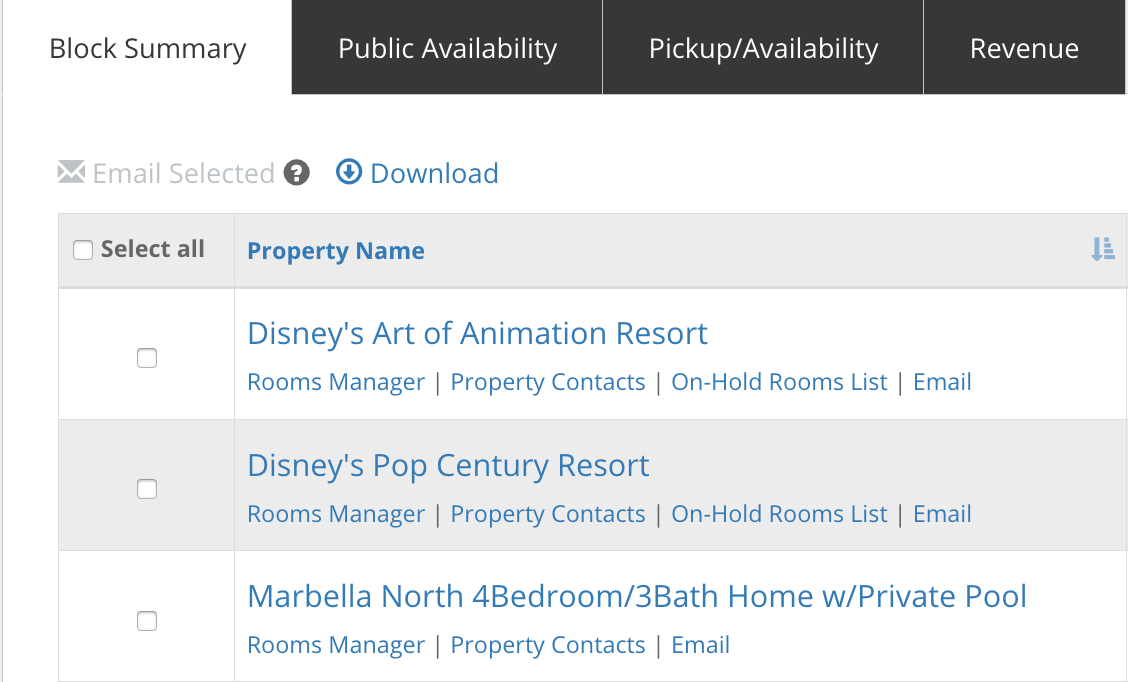
2. From the Rooms Overview (page) > Block Summary (tab) > Under the Property Name if there is an active On-Hold block, you will see an On-Hold Rooms List link.

3. From the Rooms Manager (page) > Manage Block and Rate (tab) > at the bottom of the Manage Block and Rate section.

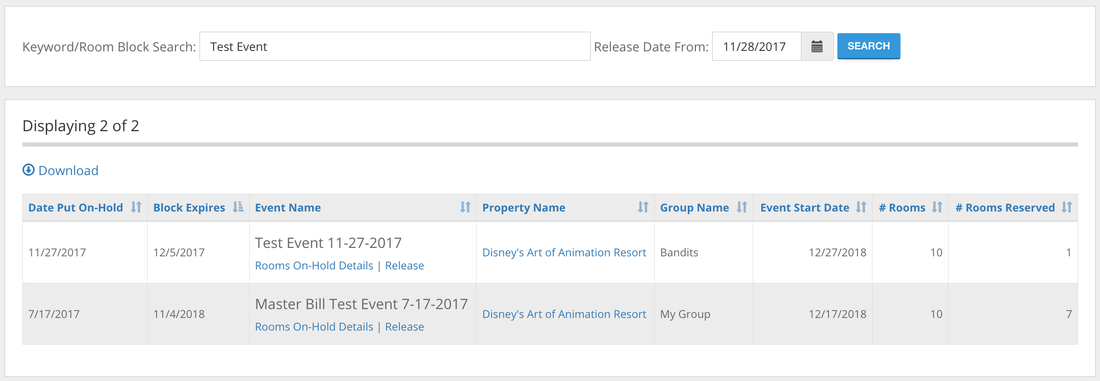
All of the above will navigate you to the Rooms On-Hold Search page, which will list all active On-Hold Blocks for your events. To find inactive On-Hold blocks, merely change the Release Date From input to date in the past when the On-Hold Block was active. To manage an On-Hold Block, click the On-Hold Block Details link.
On-Hold Block Details
Once on the On-Hold Block Details page, you can manage your On-Hold Block from the Rooms On-Hold Block Manager panel. The Rooms On-Hold Block Manager panel allows you to do the following:
Once on the On-Hold Block Details page, you can manage your On-Hold Block from the Rooms On-Hold Block Manager panel. The Rooms On-Hold Block Manager panel allows you to do the following:
- Change the Release Date
- Release the On-Hold block back to the parent block
- Email the On-Hold Rooming List
- Email the Booking Link
- Access a link to the On-Hold rooms on your booking engine
- Adjust the number of Rooms On-Hold for your block

At the bottom of the On-Hold block detail page, we'll get a list of all of the On-Hold reservations that we made.

Manage Blocks
Back inside of GPS, to manage a block for a property, we must first navigate to the Rooms Overview page for your event. From the Rooms Overview page, you will find a list of every property that you contracted a bid with. Locate the property that contains the room block that you would like to manage, and click the Rooms Manager link.
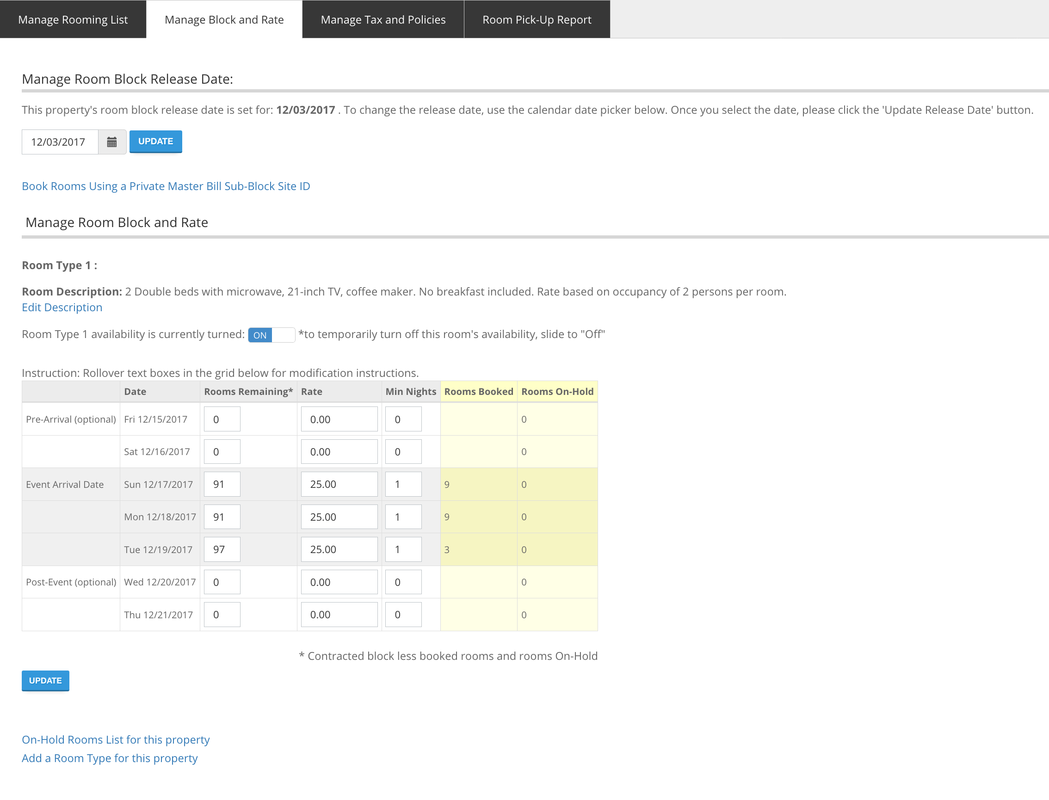
Once on the Rooms Manager page, we will need to navigate to the Manage Block and Rate tab. From the Manage Block and Rate tab we will be able to adjust the block release date, and turn on/off the block availability for each room type.
Review Rooming Lists
To review a rooming list for a property, you must first navigate to the Rooms Overview page for your event. From the Rooms Overview page, you will find a list of every property that you contracted a bid with. Locate the property that contains the rooming list that you would like to review, and click the Rooms Manager link for that property.

Once on the Rooms Manager page, you will see that Manage Rooming List tab is active. From the Manage Rooming List tab, you will be able to filter reservations by status, add manual reservations, add complementary reservations, email multiple guests, view reservation details, and edit reservation details.
Click Confirm/Modify and make a change to a reservation, such as the first or last name of a guest. A change notification will be sent to the email address of the guest and the property contact, so I recommend using one of the test reservations that we created earlier.
Click Confirm/Modify and make a change to a reservation, such as the first or last name of a guest. A change notification will be sent to the email address of the guest and the property contact, so I recommend using one of the test reservations that we created earlier.

Prioritize Tasks
Now that we've made some changes to a reservation we should have a few tasks that need to be completed. From the Dashboard of the application, you will be presented with a list of tasks in the Task Manager panel, which displays items that require your attention and need to be completed. It will be up to you which order to perform these tasks, but next to each task you will find a color-coded icon that relates to how long you have left to complete the task:
- Red - Task is due in the next 48 hours.
- Orange - Task is due in the next 5 days.
- Green - Task is due in more than 5 days.

To view all of your tasks you can either use the View All Tasks link in the Task Manager panel or use the bell link in the top navigation bar, this link also shows you a total of how many tasks have left to complete.

The View All Tasks link and the Bell icon will navigate you to the Task Manager page. Much like the Task Manager panel on the Dashboard, you will be able to filter your tasks by type.

Congratulations, you've completed Step 2 of the tutorial, and you're ready to move on to Step 3 - Reconciliation/Invoicing/Reporting
